It’s almost as though most RVers don’t know that with a well-made schedule, a comprehensive list of maintenance chores, and a bit of elbow grease, camper upkeep can be accomplished by even the most inexperienced RV owner.
Why is RV maintenance important? Well, beyond protecting your financial investment, performing regular maintenance on your RV is a way to ensure that your rig is ready to go before your next adventure.
This prevents moments of disappointment that can occur when the whole crew has packed and prepared for a trip, only to find that the RV is in need of repairs and has to spend a few days in the shop.
This comprehensive RV maintenance checklist should help guide you in the right direction for maintaining your own RV. Not all RVs will need every bit of maintenance on this list, and some tasks won’t have to be performed as often as I suggest.
This is merely information for you to reference and to help get you going on the path toward regular, thorough RV upkeep.

Importance of RV maintenance
The biggest motivator for most people to stay on top of RV maintenance is money. No one likes paying for expensive repairs, and maintenance is significantly cheaper than repairs.
Air conditioners provide a helpful example of the importance of RV maintenance. Camper air conditioners contain a filter that must be cleaned every so often. This task costs nothing to perform and is relatively easy. Every 3-6 months, remove the filter, clean it, dry it completely, and reinstall it. Not too bad, right?
Well, neglecting this minor chore can lead to significant damage to an air conditioner, sometimes resulting in the need for a replacement. You could be looking at a $2,500 price tag for an appliance that can be maintained for free.
Aside from protecting your investment, RV maintenance is a critical part of protecting yourself and your camping crew. As with cars, RV accidents can be dangerous and harmful. A well-maintained RV has a lower chance of catastrophic failure that could lead to injury or death.
And lastly, Mother Nature will thank you for regularly inspecting your camper and making sure you are not leaking any polluting chemicals into the environment. Seeing as RVs are primarily used to access beautiful natural spaces, we need to do our best to leave those spaces as unpolluted as possible.

RV maintenance checklist
Campers have many sections, appliances and systems. At first glance it can seem like an overwhelming number of components to keep track of and care for. The easiest way to stay on top of it all is by organizing everything into categories.
The seven primary categories for RV maintenance are:
- Exterior
- Roof
- Chassis/undercarriage
- Interior
- Mechanical
- Plumbing system
- Electrical system
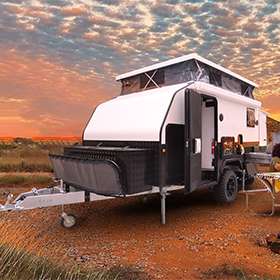
The exterior

The RV’s exterior is where you check on the condition of doors, windows, and the RV access door, potential cracking of wall panels, critter damage, weather damage, and any other external force that may have compromised the shell of the RV.
- Windows: Inspect all caulk seams and the gaskets around every window on the rig. Old, cracking caulk needs to be thoroughly scraped away and replaced with a new bead. Look for cracking or holes that could let in moisture or critters. Test dynamic functions of windows, cleaning and lubing areas that feel difficult to move.
- Doors: Inspect door seams in the same way as windows. Check hinges for sagging or signs that the door is becoming off square in the door frame. Replace bulb gaskets and weather stripping when existing pieces show signs of degradation.
- Walls: Carefully inspect walls for cracks and holes that could be an entry point for rodents and insects. Fill small penetrations with caulk. Large penetrations should be repaired by a professional RV technician. Use a soft-bristled brush to clean exterior walls with soap and water, applying a wax coat if desired.
- Shore power: Check external shore power plug for small insects, dirt, and debris. Clean as needed. Never use metal tools to clean charged electrical components.
- Lights: Test that all external lights are in working order. Replace bulbs and LEDs as necessary. Lights that are still non-operable after a bulb replacement will need to have a wiring inspection performed. Have a friend hop in the driver seat and check that turning signals and brake lights are fully operational.
RV roof
When working on a camper’s roof, always use a tall, sturdy ladder to climb on and off of the RV. Have a second person with you to stabilize the ladder from the ground. Wear grippy shoes and have a towel ready to dry wet sections of the roof. A wet RV roof is incredibly slippery and can easily cause harmful falls.
- Seals: While crawling on the roof, inspect seals around the air conditioner, ventilation fans, exhaust pipes, and any other roof penetration. Reapply caulk as needed.
- Air conditioner (A/C): Clean dirty air conditioner filters, allowing to dry completely before reinstalling in the A/C. Replace air filters annually.
- Black tank vent pipe: Use a flashlight and pole to look into the black tank vent pipe and clear any natural debris that has fallen in, such as twigs and leaves. A clogged vent pipe will cause sewer gasses to backflow into the interior of an RV.
- Roof: Carefully inspect the entire roof for signs of water leakage. Puddle stains might indicate a low spot in the roof that could develop leaks in the future. Immediately fix any leaks found and make a note to check the RV interior for water damage.
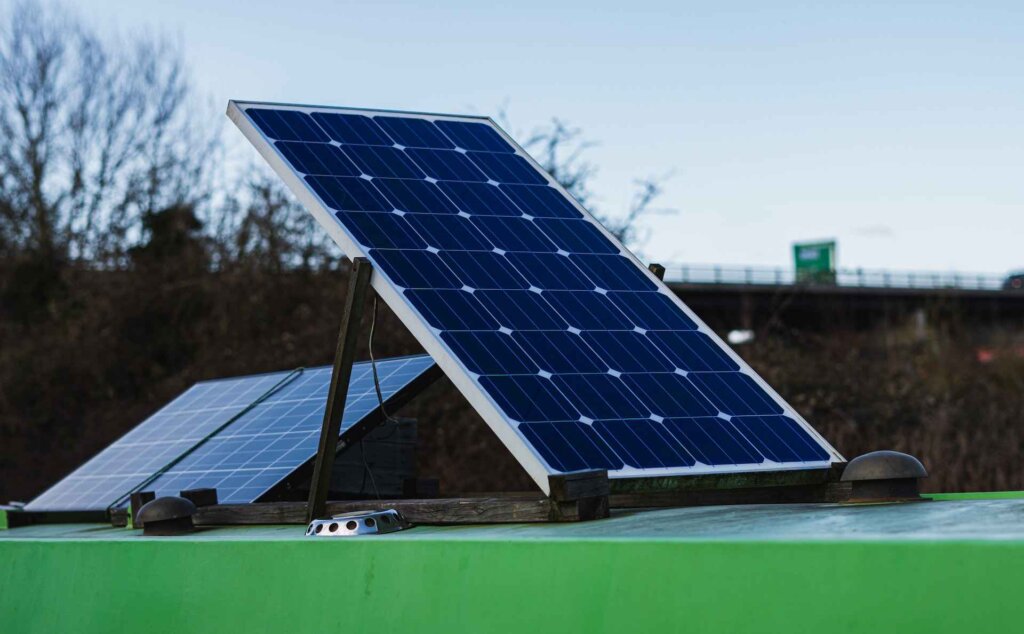
- Solar panels: Regularly clean the main surface of all solar panels to promote maximum panel efficiency. A dirty solar panel will not generate electricity as quickly as a dirty one. Visually inspect solar panel wiring, fixing wire problems as needed.
RV chassis/undercarriage
An undercarriage is the section of a vehicle that is under the main cabin. The undercarriage contains many mechanical parts, wiring, fluid lines, and the vehicle chassis.
The chassis of a vehicle is the foundational frame on which the rest of the vehicle is built. A chassis can be considered as the “bones” of a vehicle.
Due to its proximity to the surface of the road, the undercarriage of an RV is very susceptible to damage. Regular inspections should be performed on the undercarriage to ensure maximum mechanical performance of your rig.
- Mechanics: Give all mechanical components of the RV a visual inspection, paying particularly close attention to the brake assembly. Brake pads on a motorhome should be replaced every 1-2 years or every 10,000-20,000 miles.
- Wiring: Inspect all wires and wire harnesses for nicks or damage to wire casing. Tie loose wires up with cable ties, being careful to avoid moving parts.
- Chassis: Look for signs of cracking, bending, or buckling on the main chassis members. Any visual damage is a sign that the structural integrity of the chassis is compromised. and must be repaired. Any rust that is found needs to be treated fully to prevent future degradation of the frame. Treat chassis rust by sanding it all the rust away, washing the chassis with isopropyl alcohol, and applying a coat of rust protection and paint.
- Wheels: While down on the ground, give the RV wheels a glance, looking for any signs of damage. Check tire pressure and add more air if necessary. Check for signs of uneven wear on the tire treads that could indicate the need for a suspension alignment. Inconsistent tire pressure can lead to uneven tire wear.
If an RV has sat in storage for multiple months, make sure to perform a chassis and undercarriage inspection before your next trip. Idle RVs lose tire pressure, develop rust, and become critter housing quickly.
RV interior
The interior of an RV is a vast and broad space, with endless components, zones, and appliances to check. Maintain your RV interior with these chores.
- Appliances: Consult the owner’s manual for all of the various appliances in your RV. This will include your furnace, water heater, water pump, carbon monoxide detectors, smoke detector, stove, refrigerator, and roof vents. Perform any maintenance or inspections detailed in the owner’s manual, recording what maintenance tasks were performed in a maintenance log.
- Walls: Over time, RV walls build up hard to see grime and weird camp odor. Clean interior walls with a soft rag and biodegradable multi-purpose spray to keep the grime away.
- Floors: Sweep, mop, or vacuum as needed, fairly regularly. Dirty floors are welcoming to critters, especially dirty carpet. Machine-wash any washable rugs as soon as visible dirt accumulates. Check carpet and rugs for signs of mold.
- Mattress: Rotate mattress occasionally, carefully inspecting for signs of mold and mildew as you do. RV mattresses are notorious for mold growth and need to be checked often.
- Windows: Clean inner surface of all windows with glass cleaner. Brush and vacuum dirt, pollen, and other debris out of window screens whenever it accumulates. Clean screens help keep allergens out of a rig.
- Cabinetry: Clean interior of cabinets with multipurpose spray, focusing on cabinetry that holds food. Inspect for signs of rodents and pests. Lubricate squeaky or sticky hinges and slides.
Mechanical
This section only applies to motorhomes, as travel trailers do not have an engine and all mechanical components of a trailer were inspected during the undercarriage check. Unless you are a professional licensed mechanic, you will want to take your rig to a shop for this.
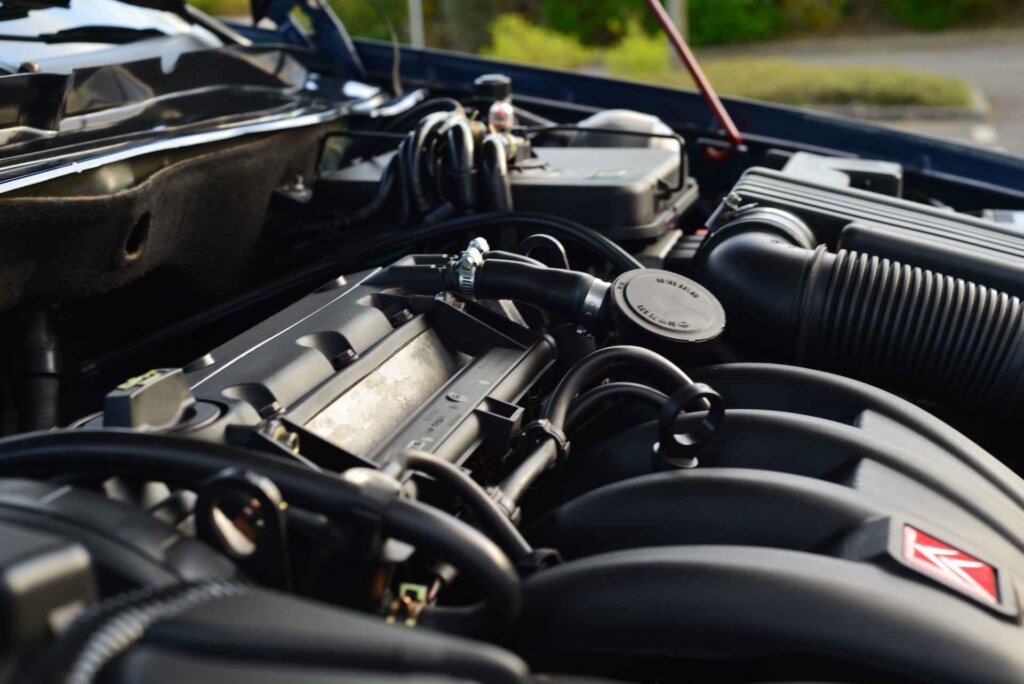
- Fluid levels: Swap out or top off all fluids in the motorhome engine. This includes engine oil, transmission fluid, brake fluid, coolant, and power steering fluid. Windshield wiper fluid can be topped off for free at home.
- Belts: Replace worn or torn belts. If belts are loose but whole and sound, tighten them making adjustments to the timing belt tensioner.
- Air filter: Replace a dirty or clogged engine air filter if necessary. Your mechanic will be able to tell you when it needs replacing.
At home mechanical maintenance:
- Engine: Rodents chew at soy in wire casings and can cause immense damage to an engine. Use pest repellent products in your engine bay when RV is in long-term storage. Consider having the engine bay steam cleaned every five years or so. A clean engine attracts less pests.
While performing RV mechanical maintenance, travel trailer owners should simultaneously work on their tow vehicle.
Plumbing system
Plumbing maintenance is more important than almost any other system or component in an RV. If you fall behind on plumbing maintenance, you risk unwanted sewer odor entering your RV, failure of holding tank parts, and harmful bacterial growth in the freshwater tank and lines.
- Black tank: Dump regularly, adding water back into the tank after each trip to a dump station. Clean black tank often using soap and water. Adding septic treatment pods to black tank to promote a healthy black tank biome. Only use septic safe toilet paper in an RV.
- Gray tank: The gray tank in an RV needs to be dumped regularly but does not need additional water or tank treatment pods. Clean your gray tank after long trips or any extended period of disuse.
- Freshwater tank: Sanitize your freshwater tank as often as you can. Install an inline water filter to run incoming water through. Replace filters often. Water treatment tablets can be added to a freshwater tank for purification purposes.
- Dumping station equipment: Immediately wash and sanitize dump hoses, potable water hose, and any other equipment used to empty holding tanks. This reduces risk of fecal contamination, and keeps odors at bay.
- Interior plumbing: Clean P-traps and sink drains often, clearing out built up gunk and algae growth. Never dump grease, fat, or cooking oil into RV drains. Doing so will definitely clog your pipes.
- Shower: Use a drain snake to remove hair from the shower drain. Clean and disinfect the interior of shower walls. Shower heads clogged with limescale can be cleaned with a distilled white vinegar soak.
Electrical system
Electrical systems in RVs do not need a whole lot of maintenance beyond the occasional inspection for damage and replacement of old parts.
- Wiring: Visually inspect all accessible wiring for signs of damage. Torn wire casing can be repaired with a wrap of electrical tape. Damage to the metal in a wire must be repaired by a licensed electrician.
- Fuses: Check all fuses in the 12-volt fuse block, replacing as needed. NEVER replace a blown fuse with a fuse that has a higher voltage rating. If you do so, you can burn your whole RV down.
- Batteries: Replace batteries every 5 to 7 years. Clean corroded battery terminals with battery cleaner. Always fully disconnect the battery from the RV system before performing maintenance. Wear rubber gloves, use no metal tools, and be careful. If given the opportunity, an auto battery can and will kill you via electrocution.
- LED strips: Visually inspect LED strip lights for signs of overheating. Replace overheated LEDs and consult an electrician to determine the cause.
Maintenance schedule
These RV maintenance tips aren’t that helpful if you don’t know how often to do these tasks! This wouldn’t be the ultimate RV maintenance checklist without a maintenance schedule included.
Here’s a breakdown of when to tackle these projects.
Monthly RV maintenance
Waste tanks need to be dumped, cleaned, and inspected monthly. More than any other set of tasks, stay on top of these ones.
Depending upon frequency of RV use, a cleaning of interior walls, rugs, kitchen, and sink drains should be performed every month or so to discourage pests from taking up home in your camper.
Inspect for exterior holes, cracks, and potential leak spots. Replace carbon monoxide and smoke detector batteries. Test and inspect all other RV safety equipment.
Bi-annual RV maintenance
Twice a year you should perform a thorough visual inspection of the whole rig, looking for leaks in the roof and rust in the undercarriage. This inspection is a good time to deep clean the exterior
Schedule an appointment with an RV mechanic every six months so a licensed professional can inspect the brakes, engine, propane system, and safety systems in the RV.
Check batteries and clean corroded terminals at least twice a year.
Yearly RV maintenance
A deep clean of your RV black and gray tank should be performed at least once a year.
Regardless of how the seams and seals on my RV look, I always give the rig a once over with a caulk gun every year.
Rust builds up slow enough that it’s only necessary to check for chassis, transmission, and exhaust rust every six months.
Extending RV life
The best way to extend the life of your RV is to store it inside of a building, away from the damaging effects of weather and wildlife. If you do not have a building large enough to house your RV when it is not in use, many storage companies offer long-term RV storage.
If you have no choice but to store your RV outside, at the very least buy an RV cover that will protect it from rain and snow.
Frequently asked questions
See what our readers are asking about RV maintenance.
Why are my brake lights burning out so quickly?
Automobile light bulbs are sensitive to the oils on human hands, and if touched during installation, can burn out quickly. Wear gloves while replacing RV brake lights.
My air conditioner doesn’t get cold anymore, can I recharge it?
Unfortunately, air conditioning systems for RVs cannot be recharged in the same way others can. Old RV A/Cs must be replaced.
Conclusion
The more maintenance you are able to learn how to perform yourself, the more confident you will be on every camping trip. Never balk at an opportunity to learn some new handy skill.
Just remember that the easiest way to avoid costly repairs on your RV is simply to keep up on maintenance. It’s not complicated.
Happy camping!