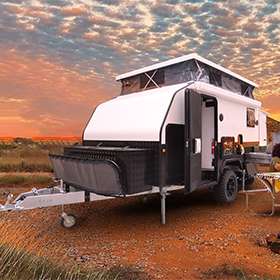
Once you’ve vetted exactly what make and model of RV you want to purchase, whether you want a new or used travel trailer, and found a rig you are interested in buying, the crucial next step will be the inspection.
In this article, I am going to walk you through all the components that you should inspect before purchasing a used motorhome, fifth-wheel trailer, camper, travel trailer, teardrop trailer, or any type of recreational vehicle. These tips will be applicable to virtually all used RVs across the board.
If you learn better visually, check out this video:
Before Meeting with the Seller
Being well prepared for your meeting with a potential seller is going to be the quickest way to show them that you mean business. Show up to a meeting with knowledge, tools, and confidence, and you could save yourself thousands of dollars during the haggling process.
What to Bring
I used to professionally convert vans into campervans, and during this time I learned exactly what tools are necessary in order to inspect the components of any RV.
If you have access to any of these tools, I highly suggest bringing them along and utilizing them during your inspection:
- Strong flashlight
- Phillips and straight-slot screwdriver
- Very small metal pry-bar
- Wrench set
- Circuit tester
- Several 12V fuses of varying voltages
- Multimeter
- Gardening gloves
- Roll of paper towels
- Sheet of cardboard or plastic (for laying on during undercarriage inspection)
What to Know
The most useful piece of information you can bring to the inspection of an RV is going to be what your specific RV needs will be while traveling in your camper.
By having a clear picture of what your needs will be while traveling in your camper, you will be able to accurately determine whether or not the RV in question is right for you.
Ponder the following questions in order to figure out exactly what you need out of an RV.
Where will you be spending the majority of your time in your RV?
If you consider yourself a desert dweller you will almost certainly want an RV with some form of awning for shade, and potentially an AC too. If your RV will serve as a ski trip crash pad, a rig with extra insulation and reliable heaters will be the route you want to take.
How much time will you spend in your camper during the day?
The more time you intend to spend in an RV, the bigger you’ll want it. Try spending several rainy days entertaining yourself in a teardrop trailer and you’ll understand how important several extra square feet can be.
What will your propane usage look like?
Propane will power many appliances in your camper. Your furnace, refrigerator, and stove top will likely all be using propane every day that you are camping.
If you like a nice toasty camper and intend to be cooking most of your own meals, you might look into a camper with several large propane tanks. Nothing kills the vibe like needing to drive back into town for a mid-trip propane refill.
Will you be hosting friends or family in your camper?
Even just two people in a camper can be a tight situation. Tack on a couple of buddies or some family, and you may end up wishing you had sprung for the 30-footer over the 26-foot model.
Hosting friends and family for a weekend out in nature is a delight. Carefully consider exactly how many beds and how much floor space you will want in order to accommodate the whole crew.
What kind of roads will you be driving your RV on?
Not all roads are created equal. Spend most of your time driving straight from the freeway to an RV park, and you will be fine towing a full-size fifth-wheel trailer.
If you intend to tow your RV into more rugged, backcountry locations, you might want to consider a trailer with maneuverability and off-road capabilities.
What to Look for in Your Inspection
Alright, let’s dive into what you really came here for; what to look for when inspecting a used RV.
The Exterior
Start your inspection on the outside of the rig. If you spot any serious problems with the exterior, you’ll quickly know whether or not it’s worth continuing the inspection.
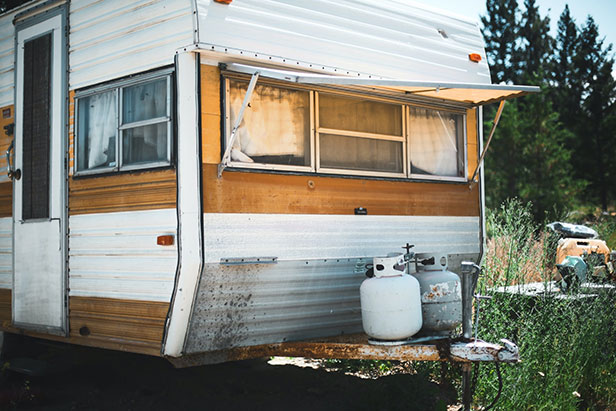
Door and Windows
Examine the caulk sealant around all doors and windows. If it is cracked, holey, or missing altogether, then the rig might have had water leaking in and causing rot damage over the years.
Test all functions of every door and window. Make sure they open and close fully and easily and have functional locks. Also, check if any pane of glass is cracked and needs replacing. It might be harder than you’d think to source a new pane of glass for an older RV.
Ripped bug screens shouldn’t be a deal-breaker. Even the most inexperienced DIYer should be able to replace a bug screen with a little help from YouTube.
Exterior Walls
Cracks in the exterior walls are another way water could be getting into a camper and wreaking havoc. Also look for holes that may have been entry ways for critters. If it looks as though any rodents or birds have been using the camper as a home, there is a high likelihood they have damaged the wiring, plumbing, or insulation in the rest of the rig.
Eyeball the walls from a distance and look for warping. Significant warping could be an indicator of frame damage from an undisclosed accident.
Roof
A thorough inspection of the roof and furnace vents is a critical part of your exterior inspection. With full exposure to sun and rain, the roof of any rig is going to take a beating and be a likely culprit for leaks and holes for critters to enter.
Check the integrity of the seals around all vents, exhaust vent fans, and windows. Use your small pry-bar to pop the screens off furnace and AC vents and look for critter nests or blockages. A dirty AC filter could be indicative of irregular maintenance. Look for holes in the bug screens on all vents.
Awnings, Slide Outs, and Jacks
Run any awnings, slide outs, or jacks through their full range of motion. Listen for squealing or grinding noises for these sounds could be indicative of malfunctioning or misaligned tracks.
Check the awning fabric for signs of wear and for holes in the fabric. Ensure the gaskets around slide outs are whole and sound, looking for any spots that might let in water.
Jacks should easily support the full weight of the camper without bowing, buckling, or sagging.
Leak Test
In all my years working as a van technician, we never sent a rig out without putting it through a rigorous leak test.
A leak test is essentially a process in which one uses a hose to simulate rain and test if there are any compromising holes in any of the camper penetrations. A dry camper is a happy camper.
Grab a hose and if possible, a buddy. Put your buddy inside the camper with a roll of paper towels and close all doors and windows tightly. Start spraying the exterior of the camper, focusing your efforts on doors, windows, vents, and slide outs.

As you do this, have your buddy listen for dripping, gurgling, or any noises that could indicate the camper is letting in water. Have them wipe dry paper towels around the edges of windows and doors. If the paper towel ends up wet, there is a leak.
Undercarriage
Grab your plastic or cardboard and lay it down underneath the rig. Shimmy yourself under the camper with your flashlight and begin surveying the state of the undercarriage. Excessive rust and corrosion are a red flag, especially if that rust is on the transmission, suspension, or exhaust.
Check the brackets securing the waste tanks and any rubber hoses leading to or from the tanks. Look for damage, clogs, or pest activity in the freshwater overflow tubes.
Electrical Systems
Now that you’ve given the exterior of the camper a thorough inspection, head inside with your bag of tools and begin testing the electrical systems.
Immediately turn the fridge on in electric mode and let it begin cooling as you continue the rest of the inspection.

AC Power System
With a circuit tester in hand, find and test all the AC outlets. These are going to be the same types of three or two-prong outlets you typically see in a home. As you do this, locate the AC breaker and test that all the breakers are functional.
Don’t forget to check any exterior outlets and your shore power connection as well.
DC Power System
Head over to the 12V fuse block with your handful of fuses. One by one, pull out each fuse and closely inspect it. If it appears the fuse has blown, replace it with a new fuse of the same voltage and run the appliance that is associated with that fuse.
If the new fuse blows, then something in the appliance is causing a short and will require maintenance, or replacement. This is a big red flag when inspecting a pre-owned RV, as these types of repairs are generally quite pricey.
Battery Bank
Pop open the battery bank box and take a peek at the condition of the batteries. Look for corrosion around the positive and negative terminals. Use your multimeter and check the voltage reading of each battery. When unplugged, your batteries should read in the 12.6-12.8 volt range.
Examine the body of each battery and look for the label with the battery’s age. Any battery older than 6 or 7 years will be on its last legs of life and will need replacing sooner than later. This shouldn’t be a deal-breaker but will be an additional cost later down the line if you decide to proceed with the purchase.
Lights
Run around and flip on and off every single light in the rig. If a light doesn’t work, check with the current owner and ask whether or not the bulb is dead or if the light has stopped working entirely. Oftentimes exterior storage compartments will have lights, so don’t forget to check them as well.
Use your screwdriver and mini pry-bar to pop open light covers. Older RVs with outdated bulb styles will be a headache to the source.
Plumbing
Freshwater Tank
Use a hose to fill the fresh water tank to full capacity and look for leaking or blockages in any tubing leading to or from the tank.
Faucets and Shower
Run the faucet and shower through their full range of functions. Ensure the water pump kicks on quickly and provides steady pressure. Give an eyeball to the water heater as well and check for leaks or signs of overheating. If the water heater runs on natural gas, sniff around the unit as it turns on and smells for any natural gas leakage.
A water heater should be able to provide steady, consistently warm water for the duration of a normal shower or the time it takes to do the dishes.
Toilet
Verify toilet flushes and drains into the septic tank with no leaking or overflowing. Check the seal around the base of the toilet, looking for dryness or cracking in the caulk.
Pipes
As you test all the various plumbing fixtures and appliances, look and listen for any leaks in the hot and cold water lines, or any pipes going to or from reservoir tanks.
Grey Water Tank
After testing the plumbing systems, pop back under the rig and check that the grey water tank is not leaking and that it smoothly drains all wastewater.
Furnace and AC
Turn the furnace on and let it run for several minutes. The furnace should produce consistent warm air without the presence of unburned natural gas. Find each furnace vent and check for clogging or any signs that the ducts are blocked.
Run the air conditioner through the same test, making sure that the air coming out of the unit is nice and cold, and that none of the filters or vents have blockages. Oftentimes AC units are mounted on the roof, so also look around for water damage around the edges of that penetration.
Refrigerator
Now that the fridge has been running for 30-45 minutes, open it up and check how cold it has gotten. The fridge should be hovering in the 40-degree Fahrenheit range, or at least be getting close to that temperature.
Toggle the fridge between electric and gas mode to ensure that both functions work properly and that the gas fires up right away.
Propane Tanks
Examine the propane tanks for any damage or signs of corrosion. Find the labels and check the age of each tank, making sure none of them are older than 10 years. Tanks older than 10 years are often not viable for a refill.
As you examine the tanks, sniff around for the scent of any leaking natural gas. Test the valves and see if they open and close fully and smoothly, and make sure the brackets holding the tanks are in solid condition.
Safety Equipment
You are almost done with your inspection! The last thing to take a peek at is all of the safety equipment in the rig. The RV should have modern and functioning smoke alarms, carbon monoxide detectors, and fire extinguishers.
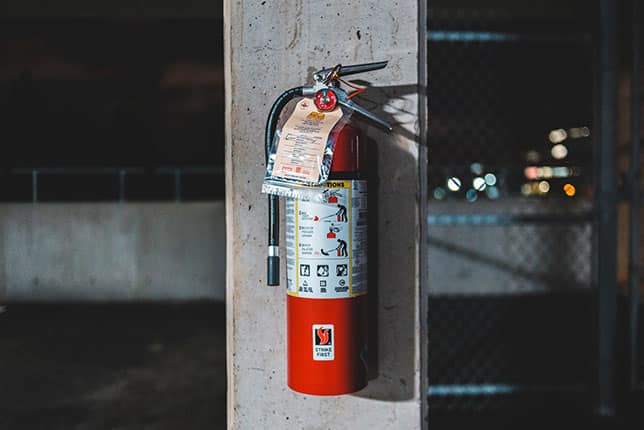
If the camper you are checking out doesn’t have any safety equipment, or if the currently installed equipment seems outdated don’t worry, replacement appliances can be bought and installed cheaply and easily.
Conclusion
The most useful piece of advice I can give on inspecting an RV is simply to be thorough. Give yourself plenty of time to comb over every nook and cranny of the camper, paying extra attention to areas the previous owners might have missed in their own inspections or during clean-up, and don’t forget to negotiate the price before making a final call. Happy camping!